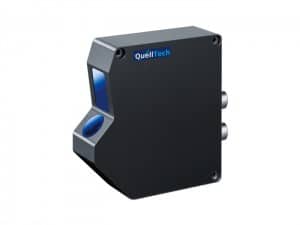
With QuellTech laser scanner-based surface inspection, there are a large number of application examples, including these:
Quality classification in sheet metal production
In stainless steel and aluminium sheet production, quality grading of each sheet is achieved by 3 D laser scanner surface inspection. Thus, 100% monitoring is achieved in the sheet metal production.
Surface inspection of metal rolls in paper production
Metal rolls for paper production with a diameter of approx. 3 m and a length of 6 m are inspected for surface defects using QuellTech laser scanners: This enables the customer to verify that the surface is free of defects during final inspection. If defects are nevertheless detected, these defects can be reworked and eliminated before the roll is delivered. Before the use of a QuellTech surface inspection system, it happened that surface defects were only discovered at the customer’s premises and a time-consuming and expensive return shipment had to be made so that the defects could be repaired.
Checking sealing surfaces of flange connections
Sealing surfaces of flange connections must be free of flaws and surface defects in order to achieve optimum sealing. Thus, the QuellTech laser scanners can check not only the surface quality but also the flatness.
Surface inspection with multiple laser scanners for complex geometries
In the production of rubber seal profiles, which often have complex geometries, several laser scanners are used at different angles to subject the complete envelope of the rubber seal to a surface inspection. This procedure can be used for continuous profiles as well as for very special profile segments.
Testing of plastic parts in the automotive industry
When inspecting plastic parts, laser scanners are used to inspect the surface of both continuous material and complex bodies. The main incentive for surface inspection of plastics is aesthetic reasons.
Weld seam inspection
An increasingly important area of application is weld inspection, which is basically a surface inspection. In this process, a whole range of welding defects become visible, such as pores, penetration notches, asymmetries, weld protrusions, cracks, component misalignment, end craters and weld spatter. Automated weld inspection with laser scanners is increasingly replacing manual visual inspection, achieving greater efficiency with a high and consistent defect detection rate.
Surface inspection in battery production
During battery production, very thin copper carrier foils are coated with various materials. It is important not only to measure the coating thicknesses but also to identify surface defects at an early stage, since these surface defects can strongly influence the subsequent electrical behavior of the battery.
Continuous product testing in throughput in Cable production
In cable production, typically 4 laser scanners are used to scan the entire surface on the 360° of the circumferences. These are mostly continuous products. If a surface defect is measured, the length coordinate of the defect location is recorded so that the defective segment can be cut out later. In the production of continuous products, very high throughput speeds are sometimes used, which means that QuellTech laser scanners with a very high scan rate (max. 200 kHz) are also used here.


